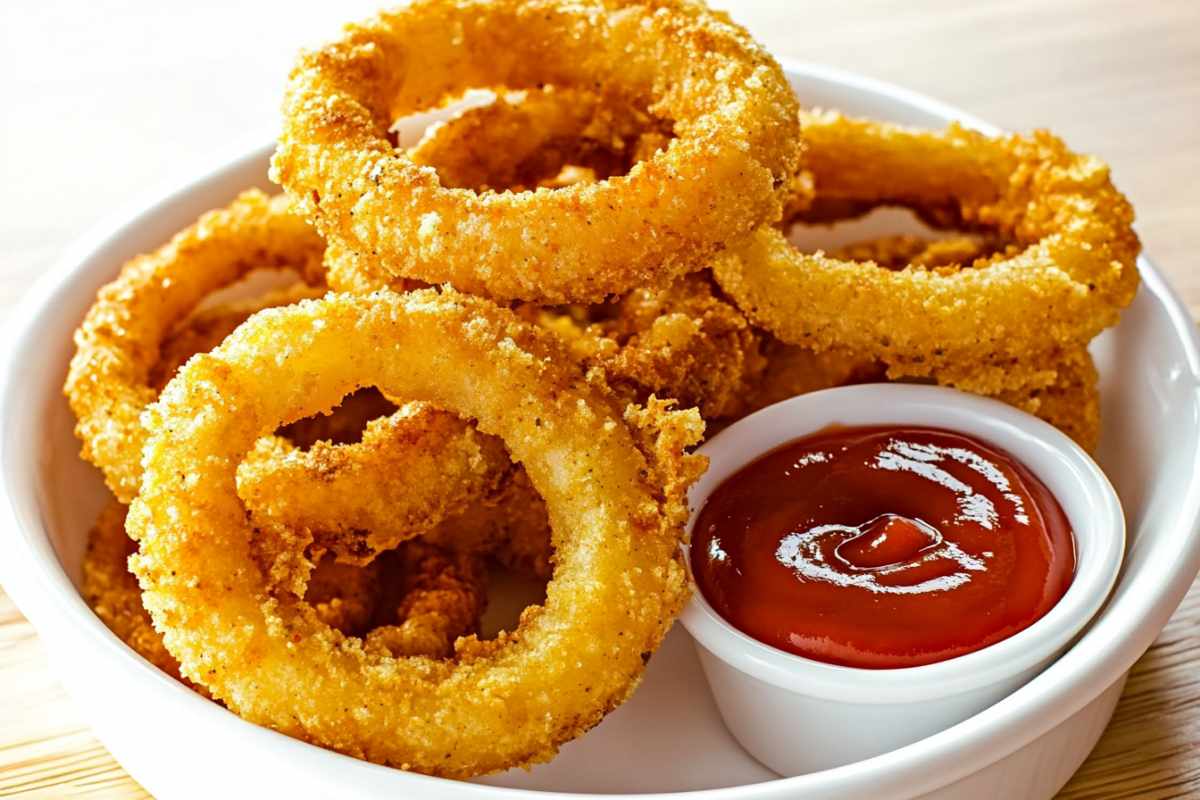
Baked onion rings offer the perfect combination of crunch and flavor, all achieved without the need for deep frying. This recipe guides you step-by-step to make delicious crispy baked onion rings that will be a hit at any meal or gathering.
Introduction to Crispy Baked Onion Rings
Onion rings have always been a crowd-pleaser, thanks to their crunchy coating and satisfying bite. In this guide, you will learn how to achieve the perfect crispy baked onion rings using simple ingredients and baking techniques.
Ingredients Overview
The secret to crispy baked onion rings lies not only in the baking process but also in the selection of the right ingredients. Here’s a detailed look at each ingredient and why it’s crucial:
Key Ingredients for Onion Rings
- Sweet Onions:
- Use 2 large sweet onions, such as Vidalia or Walla Walla, to achieve a sweeter, less pungent flavor.
- Sweet onions caramelize better during baking, adding a subtle sweetness to the final dish.
- If you prefer a more intense onion flavor, consider using yellow onions instead. For more onion-centric recipes, try this recipe for Pico de Gallo, which also uses fresh onions as a base ingredient.
- Buttermilk:
- Soak the onion rings in 1 quart of low-fat buttermilk. The buttermilk helps tenderize the onions and provides a base for the breading to adhere to.
- If you don’t have buttermilk, create a substitute by mixing 1/4 cup of white vinegar or lemon juice with milk to make 1 quart.
- The acidity in the buttermilk (or substitute) helps to soften the onion rings further, resulting in a pleasant texture inside the crispy coating.
- Egg Whites:
- Beaten egg whites act as a binder, helping the breading to stick to the onion rings.
- The egg whites also contribute to the crispiness of the coating during baking.
- To explore more egg-based recipes, check out this recipe for Classic Tiramisu, which utilizes egg whites in a different culinary context.
- Whole Wheat Flour:
- The use of 2/3 cup of whole wheat flour adds a slightly nutty flavor and helps the breading mix adhere better to the onions.
- The flour also serves as the first layer in the breading process, which helps to absorb moisture from the onions and create a dry surface for the breading.
- Cornmeal:
- Add 3/4 cup of cornmeal to the breading mixture for a coarser texture and a distinct crunch.
- The cornmeal’s texture is key to creating a crispy outer layer, similar to this recipe for Cornbread, which also emphasizes a crisp exterior.
- Panko Breadcrumbs:
- The inclusion of 1 cup of Panko breadcrumbs in the breading mix is essential for achieving a light, airy crispness.
- Panko breadcrumbs are larger and coarser than regular breadcrumbs, creating a distinct crunch when baked.
- If you’re a fan of using Panko, try the Garlic Shrimp recipe that also makes use of Panko for a similar crispy coating.
- Seasonings:
- Use 3/4 tsp of salt, 1/2 tsp of black pepper, and 1/2 tsp of paprika to season the breading.
- For a spicy kick, add cayenne pepper or chili powder.
- Seasoning is versatile, so you can customize the flavor profile to your liking. For more ways to explore different seasonings, try this Easy Smoked Fish Pie that also uses a variety of spices to enhance flavor.
The Importance of Soaking Onions
Soaking onions in buttermilk is not just an optional step; it is a crucial technique that impacts both flavor and texture. Here’s why soaking makes a significant difference:
Why Soak Onions in Buttermilk?
- The buttermilk soak allows the onion rings to become more tender, making each bite softer while maintaining the crunch of the breading.
- The longer you soak, the better the result. Soaking for at least 4 hours is recommended, but an overnight soak will yield the best texture and flavor.
- The buttermilk also helps reduce the onion’s natural sharpness, making it sweeter when baked. To explore another recipe that involves soaking, check out this Perfect Beef Curry Recipe, where marination plays a similar role in enhancing tenderness.
Alternative Soaking Methods
- If buttermilk is unavailable, try using plain yogurt mixed with a bit of water for a similar effect.
- Adding spices like paprika, cayenne pepper, or lemon juice to the buttermilk can enhance the flavor further, giving the rings a subtle kick before they’re even breaded.
Choosing the Right Onion Variety
The choice of onions can dramatically affect the flavor, texture, and appearance of the final product.
Detailed Guide to Onion Selection
- Sweet Onions: Best for a mild flavor, sweet onions work well for beginners and are often less pungent. They provide a natural sweetness that complements the breading’s crispiness.
- Vidalia onions are particularly good for a sweet, caramelized flavor.
- For more sweet and savory combinations, explore Fig Pizza, which also balances sweetness with other flavors.
- Yellow Onions: Known for their stronger, more robust flavor, yellow onions provide a sharper taste that pairs well with bolder seasonings in the breading.
- If you prefer a strong onion flavor, yellow onions are the best choice.
- This recipe for Spanish Paella also uses onions as a flavor base, showcasing their versatility in both sweet and savory dishes.
- Red Onions: While less common for onion rings, red onions can add a slightly spicy and sweet flavor profile, especially if you’re looking for a unique twist.
- Red onions are thinner and cook faster, so be mindful of the baking time to avoid burning.
Preparing the Onion Rings for Baking
Proper preparation of the onion rings is critical to ensure even cooking and a crisp texture.
Step-by-Step Slicing and Preparation
- Use a sharp chef’s knife to slice the onions into even, 1/2-inch rings. Make sure to maintain consistent thickness for uniform cooking.
- Separate the rings gently, keeping the larger outer rings for baking and reserving the smaller inner rings for another use, like in a Chicken Enchilada Soup.
- Place the separated rings in a large dish and pour the buttermilk over them. Use a heavy plate to keep the rings submerged if needed.
Additional Preparation Tips
- To prevent tears while slicing, place the onions in the freezer for 15 minutes before cutting.
- Use a mandoline slicer for uniform rings, which helps in even baking.
Creating the Breading Mixture
The breading is what gives the onion rings their signature crunch, so it’s important to get it right.
How to Make the Perfect Breading Mix
- Combine whole wheat flour, cornmeal, and Panko breadcrumbs in a large shallow dish.
- Add seasonings like salt, black pepper, and paprika, mixing well to ensure even distribution.
- For added flavor, consider adding grated Parmesan cheese, garlic powder, or onion powder to the mix.
Tips for Achieving a Coarse, Crispy Coating
- Make sure the Panko breadcrumbs are well incorporated into the flour and cornmeal mixture. This ensures an even, crispy layer that adheres to the onion rings.
- For a similar crispy breading technique, try the Red Velvet Cake, where a crumb coating is used to achieve texture.
How to Coat Onion Rings for Maximum Crispiness
The coating process is the most critical step to achieving a perfectly crispy result.
Detailed Coating Instructions
- Remove the soaked onion rings from the buttermilk, allowing the excess to drip off.
- Dip each ring into the egg whites, ensuring a light, even coating.
- Dredge the rings in the breading mixture, pressing gently to ensure that the coating adheres well.
- For a double coating, repeat the egg white dip and breading step for an extra-crispy finish.
Pro Tips for Coating
- Use one hand for dipping in the wet mixture and the other for coating in the dry mix to keep the process efficient and avoid clumping.
- Shake off any excess breading before placing the rings on the baking sheet.
- For a recipe that involves a similar coating technique, check out this Banana Blueberry Oatmeal Muffins recipe, which uses a wet-to-dry coating method.
Baking Techniques for Perfect Onion Rings
Detailed Baking Instructions
- Preheat your oven to 425°F (218°C). Ensure the oven is fully preheated before placing the rings inside.
- Line a baking sheet with parchment paper or a silicone mat to prevent sticking and ensure even baking.
- Arrange the coated onion rings in a single layer, leaving space between each ring for air circulation.
- Spray the rings lightly with non-stick oil to help the breading crisp up in the oven.
- Bake for 15 minutes, then flip each ring and bake for an additional 15 minutes or until golden brown.
Advanced Baking Tips
- For an even crispier result, use the convection setting on your oven if available.
- Rotate the baking sheet halfway through cooking to ensure even browning.
- Allow the onion rings to cool for a few minutes on a wire rack after baking. This prevents them from becoming soggy and helps maintain their crisp texture.
- For another baked recipe with a crispy texture, try the Churro Cheesecake, which uses a similar baking technique to achieve a crunchy crust.
Serving Suggestions
Onion rings can be enjoyed alone or as part of a larger meal.
Best Dips for Baked Onion Rings
- Ketchup: The classic choice that complements the savory flavor of onion rings.
- Spicy Mayo: Mix mayonnaise with Sriracha for a spicy kick.
- Garlic Aioli: Whisk mayonnaise with minced garlic, lemon juice, and a dash of salt for a flavorful dip.
How to Serve Onion Rings
- Serve as a side to burgers, wraps, or sandwiches. Consider pairing them with these Chicken Caesar Wraps, which offer a delicious combination of flavors.
- Present onion rings in a basket lined with parchment paper for a classic diner-style look.
Storing and Reheating Tips
Storing Onion Rings
- Store in an airtight container to maintain freshness. They can last up to 3 days in the fridge.
- For longer storage, freeze the baked onion rings in a single layer on a baking sheet before transferring them to a freezer-safe container. This prevents them from sticking together.
Reheating Techniques for Maximum Crunch
- Reheat in an oven at 350°F (177°C) for 10-15 minutes until warmed through. This method ensures the rings remain crispy.
- Avoid using a microwave, as it will soften the crispy coating.
- For more tips on reheating baked goods, try this Ultimate Guide to Pumpkin Cheesecake, which also emphasizes oven reheating for the best results.
FAQs
1. What’s the Secret to Crispy Baked Onion Rings?
The secret is a combination of using Panko breadcrumbs, a well-seasoned breading mix, and high baking temperatures. Double-coating the rings can also enhance crispiness.
2. How Long Should I Soak the Onions?
For the best texture and flavor, soak the onions for at least 4 hours. Soaking overnight yields the most tender results.
3. Can I Make Onion Rings Ahead of Time?
Yes, you can prepare the rings up to the breading step and refrigerate them until ready to bake. Baking them fresh ensures the best crispiness.
4. Can I Freeze Baked Onion Rings?
Yes, baked onion rings freeze well. Reheat them directly from the freezer in a preheated oven for 10-15 minutes at 350°F (177°C).
Conclusion
This comprehensive guide has taken you through every step of making the perfect crispy baked onion rings. Whether you’re preparing them for a party or just a simple snack, these rings are sure to impress. Enjoy exploring the variations and techniques that make this recipe a standout.
For more delicious baked dishes, try the Perfect Classic French Croissant recipe, which also emphasizes technique for achieving crisp layers.

