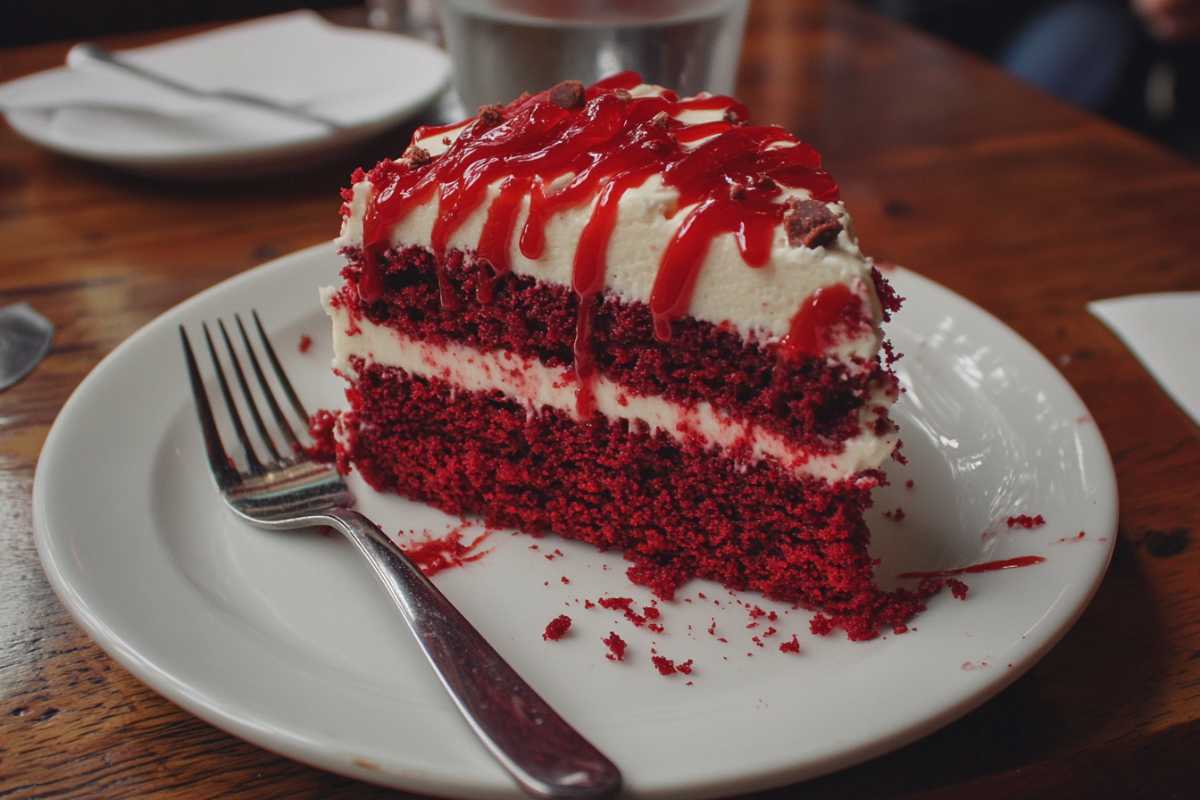
The red velvet cake is a classic dessert that has stood the test of time with its striking red hue, velvety texture, and unique flavor profile. Originating from the southern United States, this cake has become a go-to choice for special occasions and celebrations due to its elegant appearance and rich taste.
A Brief History
- The evolution of red velvet cake began in the 19th century with the creation of velvet cakes that had a smoother texture than traditional cakes.
- It gained significant popularity in the 1920s and 1930s, especially in Southern American cuisine.
- The classic pairing of red velvet cake with cream cheese frosting further elevated its status among dessert enthusiasts.
Ingredients Overview
Creating the perfect red velvet cake involves selecting the right ingredients and understanding their roles in the cake’s texture, flavor, and appearance.
Essential Ingredients
- Flour: For the best results, always use cake flour, which has a lower protein content than all-purpose flour. This difference helps create a finer, more tender crumb that is essential for the soft texture of red velvet cake. If you’re interested in mastering other delicate desserts, consider trying these Fluffy Cinnamon Rolls that also benefit from the use of cake flour.
- Cocoa Powder: Although the amount of cocoa powder in red velvet cake is small, its role is crucial. It adds a subtle chocolate undertone that enhances the complexity of the cake’s flavor. For those who enjoy deeper chocolate flavors, the Mint Chocolate Brownies might be a recipe worth exploring.
- Buttermilk: The acidic properties of buttermilk not only contribute to the cake’s moistness but also activate the baking soda, which helps the cake rise properly. Buttermilk’s unique tangy flavor balances the sweetness of the cake, making it an irreplaceable ingredient in traditional red velvet cake recipes.
- Vinegar: The addition of vinegar might seem unusual in baking, but it plays a significant role in the texture of red velvet cake. Vinegar reacts with baking soda to create a fluffy and tender cake crumb. For another recipe that utilizes this technique, check out the Mastering Red Cabbage Soup which also benefits from vinegar’s enhancing properties.
- Red Food Coloring: Achieving the iconic color of red velvet cake is primarily due to the addition of red food coloring. While some prefer to use natural alternatives like beet juice, the bold red color from synthetic food coloring remains a classic characteristic.
- Cream Cheese Frosting Ingredients: The richness of the frosting is achieved by combining butter, cream cheese, powdered sugar, and vanilla extract. The creamy consistency and slight tang from the cream cheese perfectly complement the cake’s flavor, making it a staple for this dessert.
Ingredient Variations
- Gluten-Free Option: If you’re adapting this recipe for a gluten-free diet, use a gluten-free all-purpose flour blend. Ensure the blend includes xanthan gum or another binding agent to maintain the cake’s structure.
- Vegan Adaptation: For a plant-based version of red velvet cake, replace the buttermilk with almond or soy milk mixed with a tablespoon of vinegar to mimic the acidity. Use dairy-free cream cheese for the frosting, which will still provide that classic creamy texture.
Equipment Needed
Using the right tools can make a significant difference in the outcome of your red velvet cake. Here’s a detailed list of what you’ll need to get the best results:
- Mixing Bowls: Have several mixing bowls ready for separating your wet and dry ingredients. The size of the bowls can vary, but it’s ideal to have one large bowl for mixing the batter and smaller bowls for preparation.
- Electric Mixer: An electric mixer, whether stand or hand-held, is essential for achieving a smooth batter and lump-free frosting. For precision when mixing other desserts like the Italian Grape Cake, an electric mixer can ensure a consistently airy texture.
- Measuring Cups and Spoons: Accurate measurements are crucial in baking to maintain the balance of ingredients, especially when working with dry components like flour and cocoa powder.
- Cake Pans: Two 9-inch round cake pans are recommended for this recipe. Ensure the pans are non-stick or properly greased to facilitate easy removal of the cake layers.
- Cooling Racks: Cooling racks help the cakes cool evenly and prevent them from becoming soggy on the bottom. Properly cooled layers are crucial for applying the frosting without melting.
Step-by-Step Instructions for Making Red Velvet Cake
Preparation of Ingredients
- Begin by preheating your oven to 350°F (175°C) to ensure it’s at the correct temperature by the time you’re ready to bake.
- Grease the cake pans and dust them lightly with flour, or use parchment paper to prevent the cake from sticking.
- Sift the cake flour and cocoa powder into a large bowl to break up any lumps, ensuring a smooth batter.
Mixing the Dry Ingredients
- In the large bowl with sifted cake flour and cocoa powder, add:
- 1 teaspoon of baking soda
- ½ teaspoon of salt
- Whisk these dry ingredients together thoroughly to ensure they are evenly distributed. This step is similar to preparing the base of many other cakes, such as the Brazilian Carrot Cake where even distribution of ingredients is key.
Mixing the Wet Ingredients
- In a separate mixing bowl, combine the following:
- 1 ½ cups of granulated sugar with 1 cup of vegetable oil until well blended.
- Add two large eggs, one at a time, and mix until the eggs are fully incorporated.
- Stir in 1 teaspoon of vanilla extract to enhance the flavor.
- Gradually add the buttermilk, followed by the red food coloring, and mix until the color is uniformly distributed throughout the mixture.
Combining the Ingredients
- Slowly add the dry ingredients to the wet mixture, mixing on low speed just until the batter comes together.
- Avoid over-mixing as it can cause the gluten in the flour to overdevelop, resulting in a dense cake texture. For another example of batter preparation techniques, you can explore the Chocolate Chip Cookies recipe, which also highlights the importance of gentle mixing.
Baking the Cake Layers
- Divide the batter evenly between the two prepared cake pans, spreading it out with a spatula to create a smooth surface.
- Bake in the preheated oven for 25-30 minutes or until a toothpick inserted into the center comes out clean. Rotate the pans halfway through to ensure even baking.
- Over-baking can cause the cake to dry out, so keep a close eye on the timing to achieve a perfect bake.
Cooling and Preparing for Frosting
- Let the cakes cool in the pans for about 10 minutes, then transfer them to wire racks to cool completely.
- Ensure the cakes are fully cooled before frosting to prevent the frosting from melting and becoming too soft.
Frosting Options for Red Velvet Cake
Traditional Cream Cheese Frosting
- To prepare the classic cream cheese frosting, combine:
- 8 oz of softened cream cheese with ½ cup of unsalted butter.
- Gradually add 4 cups of powdered sugar, mixing until the frosting is smooth and thick.
- Incorporate 1 teaspoon of vanilla extract to round out the flavor.
- For more tips on achieving the perfect frosting consistency, you might want to explore techniques used in the Vanilla Panna Cotta recipe, which emphasizes smooth textures.
Alternative Frosting Options
- Mascarpone Frosting: This variation offers a slightly different taste and texture, making the cake richer and creamier.
- Buttercream Frosting: Ideal for those who prefer a sweeter frosting that can be easily piped into decorative designs.
Tips for Achieving the Perfect Red Velvet Cake
Room Temperature Ingredients
- Always bring ingredients like eggs and buttermilk to room temperature before mixing. This ensures that the batter blends smoothly, resulting in a lighter texture.
Proper Measuring Techniques
- When measuring flour, spoon it into the measuring cup and level it off with a knife rather than scooping directly from the bag, which can pack the flour and result in a denser cake.
Preventing Cake From Sinking
- Avoid opening the oven door frequently while baking, as sudden drops in temperature can cause the cake to sink in the middle.
Red Velvet Cake Variations
Red Velvet Brownies
For a unique twist on the classic cake, these red velvet brownies provide the same rich taste but with a dense, fudgy texture that’s perfect for casual gatherings.
Red Velvet Cupcakes
Transforming the cake batter into cupcakes is a great way to serve individual portions at parties or events. The cupcakes can be topped with a swirl of cream cheese frosting for a perfect treat.
Red Velvet Cheesecake Layer Cake
Combine the elegance of red velvet cake with the creaminess of cheesecake layers to create a stunning dessert that’s sure to impress. This combination offers the best of both worlds for those who love both cake and cheesecake.
Serving Suggestions and Storage Tips
Serving Suggestions
- Serve your red velvet cake with a garnish of fresh berries or a drizzle of melted dark chocolate for added elegance.
- Pair it with a hot cup of coffee or a glass of cold milk to balance the sweetness.
Storage Tips
- Store the cake in an airtight container to keep it moist and flavorful for several days.
- If you have leftovers, you can freeze the cake layers (unfrosted) by wrapping them tightly in plastic wrap, then placing them in a freezer-safe bag. Thaw in the refrigerator overnight before serving.
Frequently Asked Questions About Red Velvet Cake
- Why is red velvet cake red?
- The red color originally came from the natural reaction between cocoa powder and acidic ingredients, but today it’s often enhanced with red food coloring to give it a more vibrant appearance.
- What makes red velvet cake different from chocolate cake?
- Unlike traditional chocolate cake, red velvet cake has a unique combination of mild cocoa flavor with a tangy taste from the buttermilk and vinegar.
- Can I make a vegan version of red velvet cake?
- Yes, simply replace dairy products with plant-based alternatives like almond milk and dairy-free cream cheese for the frosting.
Conclusion
The red velvet cake recipe is a perfect blend of sophistication and comfort, making it an ideal choice for any celebration. With this comprehensive guide, you’ll be able to bake a cake that’s not only visually stunning but also incredibly delicious. Don’t hesitate to experiment with different variations and make this cake your own masterpiece.
Enjoy your baking journey, and make sure to explore more delightful recipes that will complement your red velvet cake perfectly!

